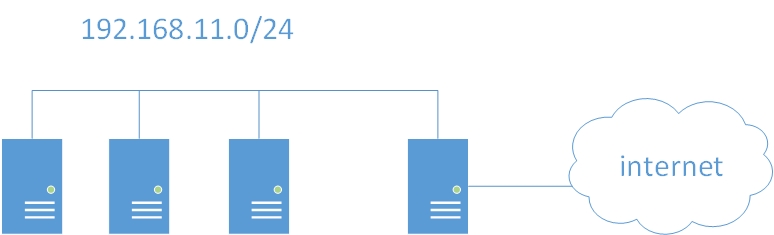
If you need to share a single internet connection to other devices in your network, then NAT is the way to go. Most network appliances with routing capability include this by default. In a cloud virtual data center, you either need to use those fancy modules (that would certainly cost you), or add a virtual network appliance from cisco or others (again, cost more than a dime). Or if you have a disk, processor, and ram to spare, build a linux box and setup NAT with iptables. For the purpose of this tutorial, this is how the network is set:

The first 3 nodes on the left are connected only to the internal network, and the internal network subnet is 192.168.11.0/24. The most right node has 2 interfaces. For this tutorial, eth0 has a public IP address and is connected to the internet. The eth1 is connected to the internal network and shall act as the internet gateway for devices that reside on the internal network. The IP assigned to eth1 is 192.168.11.2
1. Setup and prepare linux box
Pick your fave flavor of distro. Distro with small footprint such as puppy are good choices. CentOS or Suse will do fine as long as you can trim uneeeded components and services that are installed by default. For this tutorial, I picked ubuntu. A single core, 2GB, with minimal disk should suffice. The instance shoud have 2 interface, with one connected to the internet, and the other attached to the internal network. Enable IP forwarding on the kernel by performing:
root@echo:~$ echo 1 > /proc/sys/net/ipv4/ip_forward
2. Make sure iptables packages are installed
Iptables is a standard linux package, and should be available by default on any linux install. Newer version of ubuntu uses ufw as iptables front end.
For Ubuntu and other .deb distros:
root@echo:~# dpkg -l | grep iptables
ii  iptables      1.4.12-2ubuntu2         amd64        administration tools for packet filtering and NAT
For CentOS and RHEL derivatives:
[root@whisper ~]# rpm -qa | grep iptables
iptables-1.3.8-5.fc8
iptables-ipv6-1.3.8-5.fc8
3. Setup iptable rules for NAT
First, clean up the existing tables
root@echo:~# iptables --delete-chain
root@echo:~# iptables --flush
root@echo:~# iptables --table nat --delete-chain
root@echo:~# iptables --table nat --flush
Next, to setup the NAT table. Start by allowing forwarding for incoming traffic from internal network
root@echo:~# iptables -A FORWARD -s 192.168.11.0/24 -j ACCEPT
..and then setup NAT for traffic from internal network, exiting through eth0 to the internet
root@echo:~# iptables -t nat -A POSTROUTING -o eth0 -s 192.168.11.0/24 -j MASQUERADE
Done!
To test the NAT, go to one of the node inside the internal network, set the defaul gateway to the ip of eth1 (in this case, 192.168.11.2), set the DNS accordingly (you can use google’s 8.8.8.8). Open a browser and see if you can access the internet from there.