So the company i’m working for regularly held a grand meeting where participants from multiple cities Indonesia log into the meeting with Skype via crappy DSL lines. The result of course was far from satisfactory.
So I searched around for a solution that I can deploy locally (since we do have stable, private connection to those branches) so that the video conference will not be bottlenecked by Telkom’s crappy uplink. Jitsi is one of them.
Jitsi is built around WebRTC, which means the conference participants can join in on a meeting only with their web browser. Installing Jitsi on Ubuntu is ridiculously straightforward, the guide will assume:
- The server uses private IP and access from the internet will use NAT-ed public IP
- Optional Let’s Encrypt SSL certificate requires valid FQDN which will be validated by LE
- Instance used: Ubuntu 16.04.3
On your firewall, open:
- tcp 80 (http)
- tcp 443 (https)
- 10000 to 20000
After you prepare your Ubuntu instance, go ahead and update it:
sudo apt-get update && sudo apt-get upgrade
Register Jitsi repo key:
wget -qO - https://download.jitsi.org/jitsi-key.gpg.key | sudo apt-key add -
Add the repo to your repo list
sudo sh -c "echo 'deb https://download.jitsi.org stable/' > /etc/apt/sources.list.d/jitsi-stable.list"
..and update
sudo apt-get update
And install the all of the component in one go with:
sudo apt-get -y install jitsi-meet
The installation will prompt you:

Put in a valid FQDN, especially if you want to use Let’s Encrypt SSL Certificate.
The installation will also prompt you to either use your existing SSL certificate, or let the installation process create a self-signed certificate which you can replace later.

Since we’re going to use Let’s Encrypt SSL certificate, select “Generate new self-signed certificate” and let the installation process finish its course.
If you are using NAT to expose your box to the internet, you need to add a few lines into one of the config file:
nano /etc/jitsi/videobridge/sip-communicator.propertiesAdd
org.jitsi.videobridge.NAT_HARVESTER_LOCAL_ADDRESS=your.private.ip.address
org.jitsi.videobridge.NAT_HARVESTER_PUBLIC_ADDRESS=your.public.ip.address
to the end of the file, save and restart jitsi-videobridge
sudo systemctl restart jitsi-videobridge.service
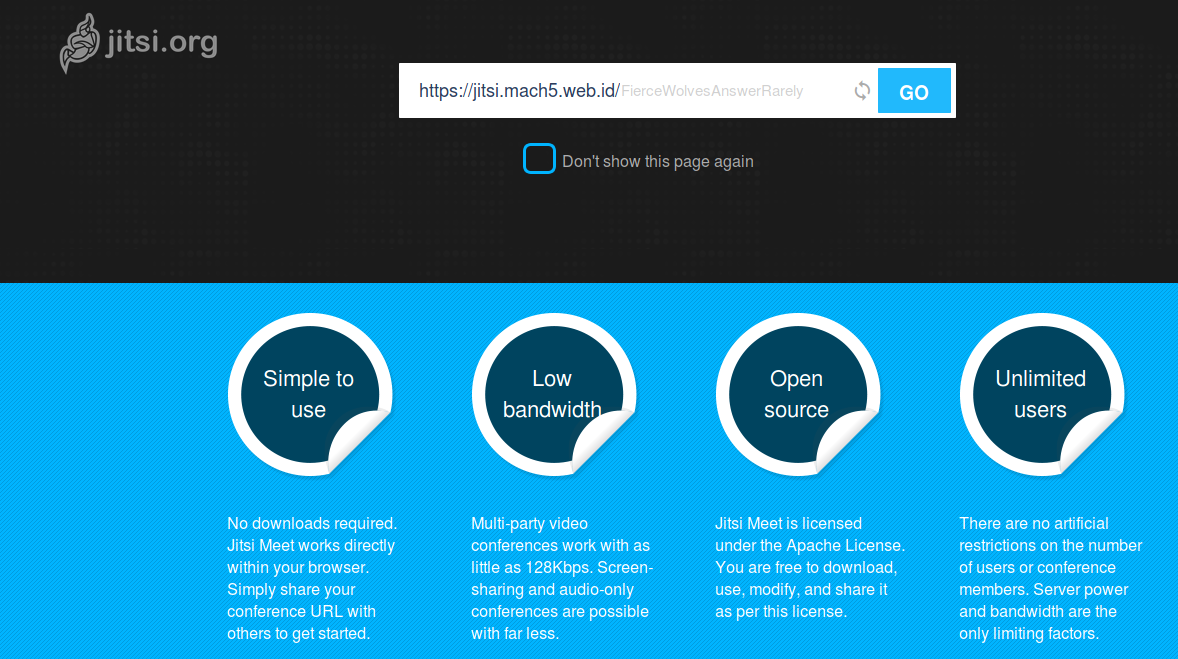
Access the server with your browser. Create a new room or join in an existing conference by typing the name of the room into the URL box.

You can also go straight into the a conference room by putting it to the url, such as https://jitsi.mach5.web.id/centurion with “centurion” being the name of the conference room
Give the browser the right to access your webcam and mic

On Ubuntu, screensharing option is available on Firefox but not on chrome.
You can also join in a conference via iPhone or android phone, but only if your site has a proper SSL certificate, since the app does not provide option to trust self-signed certificate.
Enabling Let’s Encrypt SSL Certificate
The newest Jitsi package includes a script to automate generation and installation of Let’s Encrypt certificate. Just run:
sudo /usr/share/jitsi-meet/scripts/install-letsencrypt-cert.sh
Type in your email address which will be used to tie-in your identity to the certificate. The process will use port 80 of your box to do http challenge to make sure that the registered url belong to the box.
When it’s done, you should be able to use the addroid and iOS app to connect to the server.