Can you move Azure VMs between region? Well.. sort of. You can’t exactly migrate VMs a la VMWare’s vMotion, what you can do instead, is to copy the disk between storage accounts and create a new VM from that particular disk, thus essentially migrating them 🙂
Step 1: Preparation
The task includes copying disks between storage accounts. This will be done using a small application called AzCopy, and will probably take a bit of your time to finish, depending on the size of the VHDs you’re migrating. For my convenience, I prefer to set a small Windows server VM on azure to do the job. In doing so, I can log imto the small vm via RDP, start the copy process, and leave the RDP session running in the background. Or you can use your Windows workstation to do that. Get the latest version of AzCopy here, or read more about AzCopy here. Install AzCopy on your new Azure VM or your workstation. By default, it will install on C:\Program Files (x86)\Microsoft SDKs\Azure\AzCopy if you’re on a 64-bit system, or C:\Program Files\Microsoft SDKs\Azure\AzCopy on a 32-bit system
On to step 2.
Step 2: Create a new Storage account on the target region
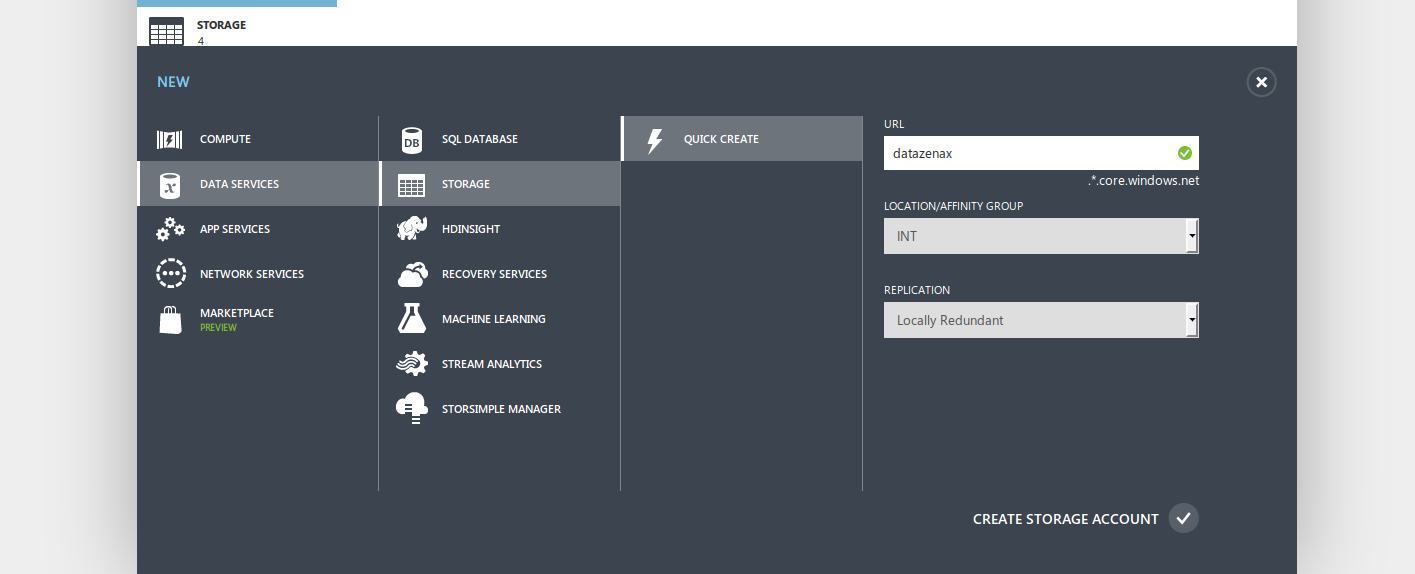
Go to your Azure Dashboard and create a new Storage Account and make sure you’re creating them on the correct location/affinity group, which obviously the target region of the migration 😀

new storage account
Create a new container called “vhds” on your newly created Storage Account. This will be the new home for the migrating vhds

Take note on the URL for the new container, as we will use it at later step.

Step 3: Shutdown the VMs
You’ll need to shutdown each VM that you’ll be migrating. This should be an easy and straightforward task, right? RIGHT?!?!
Step 4: Copy the disk across regions
You will need the storage account key for the source and target Storage Account handy. To get them, go to your Azure Dashboard, go to Storage, select the source Storage Account, and at the bottom of the page you’ll find a “Manage Keys” link to access your Storage Account Key. You’ll need the Primary key. Copy the value by tapping the “copy” icon on the right side of the box. Keep it somewhere safe. Do the same with the target Storage Account

You’ll also need the name of the URL of the source and target containers. Trace back to step 2 to get the URL for the target container. For the URL for source container, on your Azure dashboard go to “Virtual Machines”, click the VM you’ll be migrating to go to its’ dashboard, and scroll to “disks” Copy the VHD URL, and paste it to you prefered text editor. It should look similar to this:
https://windam.blob.core.windows.net/vhds/APT001-APT001-2015-07-10.vhd
“https://windam.blob.core.windows.net/vhds” will be the source we’ll be migrating from, and “APT001-APT001-2015-07-10.vhd” is the name of the disk we’ll be migrating.
Now let’s construct our AzCopy command
AzCopy /Source:sourceVHDS /Dest:targetVHDS /sourceKey:SourcePrimaryAccessKey /DestKey:TargetPrimaryAccessKey /Pattern:VHDFileName
ie:
AzCopy /Source:https://windam.blob.core.windows.net/vhds /Dest:https://datazenax.blob.core.windows.net/vhds /sourceKey:Y9jpxMioNLFW39i0wpR4u1JxHOpSRWm52fv5LZeuY/ANSk3CpeoCHf3yvhadvKh0dTBs2B7MmB4A== /DestKey:q+Fzp8iVtPS6LflP643wQDOPc2kwJIs0tRhcKk8muDAPYnfK+prNvKJyEoMFoxOvGO6cmhQv48XcqREie7WZOrP4zt+TdWxQ== /Pattern:APT0001-APT0001-2015-07-07.vhd
Let it run for a bit, go make a cup of tea if you want to. When it finishes, it should look like this:

Step 5: Recreate the VM
First, you need to convert the VHDs to a disk. To do that, go to “Virtual Machines” and go to the “Disks” tab. Click “Create”

Fill the name of the new disk, and click the folder button to find the migrated disks on VHDS container at the target Storage Account. Make sure the “The VHD contains an operating system” is selected, and select either Linux or Windows, in accordance with whatever is residing in your disk.
Now, let’s recreate the VM. Create a new virtual machine from Gallery, and select my Disks.

Select the disk you have created earlier, and finish the rest of the step as usual.

..And we’re done 🙂